A Carrier's Guide To Properly Conduct A Pre-Trip Inspection
Your responsibility as a carrier is to ensure the safety of you, your cargo, and the general public on the roads. Conducting pre-trip inspections is critical to identify any potential issues that can be fixed prior to your trip.
Due to the essential part that pre-trip inspections play in ensuring safety, every carrier is required to conduct a pre-trip inspection before every trip. If your trip spans multiple days, you are required to conduct a pre-trip inspection 24 hours.
In the blog, we are going to dive into how you can properly conduct a pre-trip inspection.
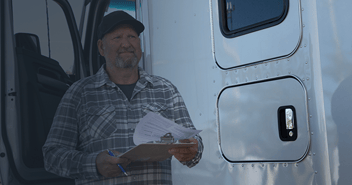
Step 1: Necessary Documentation
Before physically inspecting your equipment, you first need to ensure that you have all the necessary documentation in your cab. This includes:
- Driver's license
- Medical Certificate
- Motor Carrier Authority
- Truck and Trailer Registration
- Insurance
- Annual Vehicle Inspection Report on truck and trailer
- Updated IFTA License
- Any additional requirements based the state of operation, type of loads carried, etc. For this information, check out the FMCSA website HERE.
If you are using an ELD you will also need at least 8 days’ worth of paper logs and the ELD operating instructions in case your ELD malfunctions.
Step 2: External Inspection
Once have all the proper documentation together, the next step is to examine the exterior of your equipment. The first part of this examination will start with your truck. In this section, we will outline the specific areas of your truck that require inspection.
- Exterior
Start with examining the exterior for your truck by checking for the following:- Carrier name and USDOT # is displayed as required
- Exterior body components (hood, bumpers, mud flaps, etc) are attached/secured
- Side view mirrors are securely attached and adjusted to the drivers liking
- Windshield and windows are not broken, obscured or blocked
- Reflective tape is attached to the corners, sides and rear of the vehicle(s) as required
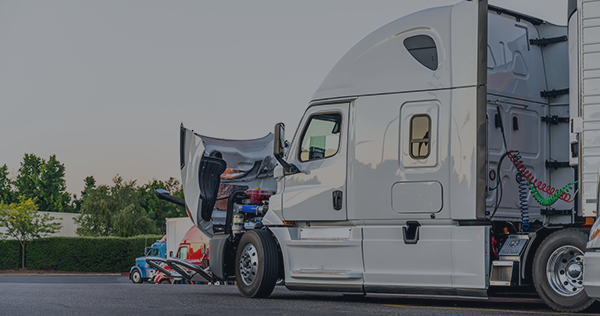
- Engine Compartment
Examining your engine will ensure proper engine function and allow you to address issues, like leaks (air and fluid) or worn-out components, prior to your trip. You should inspect the following:- Radiator
- Air Compressor
- Steering gearbox
- Steering linkage
- Water pump
- Alternator
- Belts
- Hoses & wiring
- Fluid Levels
There are several reasons why your fluids need to be at a healthy level prior to your trip, like heat regulation of your equipment, poor steering functions, and more. When checking your fluids, make sure there aren’t any signs of leaks on the ground. You should examine the following fluids:- Oil
- Coolant
- Power steering
- Transmission fluid levels
- Windshield washer fluid
- Exterior Lights
Check your lights to ensure they are working correctly. If a light seems dim or burn out, make sure to replace it prior to hitting the road. You should check the following lights:- Headlights
- Taillights
- Brake lights
- Turn signals
- Over-Head marking and clearance lamps
- Tires
Examining your tires is critical to ensure that they are good condition and are properly inflated. When checking your tires, make sure to look for signs of wear, damage, irregularities, and any visible bulges or cuts. In addition, there shouldn’t be any foreign objects between your wheels, and no space between the tires and rimes.
Also, ensure your wheel lug nuts are securely tightened. If you see any rust, this could mean that the bolt hole is expanding, and your tire may come loose. - Brakes
Ensuring that your brakes are working properly is crucial to prevent incidents on the road. When inspecting your brakes, test the air for functionality, listen for any unusual sounds, and check for visible leaks. In addition, examine your brake pads and drums for signs of wear, and ensure your brake linings meet the appropriate thickness standards. - Undercarriage
Without a properly functioning undercarriage, you will experience issues with braking, steering, and controlling the vehicle. When examining the undercarriage, look for signs of damage, loose components and fluid leaks. Listen for air leaks as you walk around your vehicle. Also, make sure to pay special attention to the exhaust system and any visible suspension components. - Coupling System
If your coupling system isn’t functioning properly or has damage, you are putting yourself at a high risk of losing your load. You should examine the following parts:- Kingpin
- Fifth Wheel
- Apron
- Gap between truck and trailer
- Mounting bolt
- Platform
- Gap
- Glad hands, listen for air leaks
- Electrical pigtail is securely attached
- Locking jaws
- Release arm
- Skid plate
Step 3: Trailer Inspection
The next step in your external inspection is to inspection your trailer to ensure that you don’t have any holes, cracks, breaks, bends, or missing rivets. In this section, we will outline the specific areas of your trailer that require inspection:
- Trailer Lights
- Trailer Tires
- Trailer Brakes
- Load/Cargo
Make sure securement devices are tightened correctly, serviceable and the required number of securement devices are being used. This will help keep your loads safe and prevent you from failing a roadside inspection.
Step 4: Internal Inspection
Now that you’ve completed an external inspection of your truck, the next step in your pre-trip inspection is to perform an internal examination of your cab.
- Cab Area
Make sure your cab is clean and has all the necessary documents in an accessible area. - Test the Dashboard Instruments
Start the engine to inspect dashboard instruments for proper functionality, ensuring all gauges read within normal ranges. This is crucial to promptly alert you in the event of any mishap with your equipment. - Examine the Steering Wheel
Assess the functionality of your steering wheel and make sure there is no stiffness when turning the wheel. - Verify Seatbelt Functionality
Ensure seatbelts are in good condition and function correctly. - Windshield wipers
Make sure they are functioning and capable of clearing the windshield with window washer fluid. - Defroster
- City and Air Horn
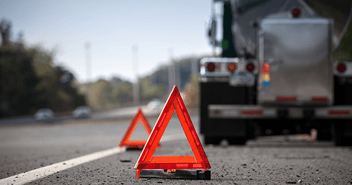
Step 5: Emergency Kit Inspection
The final step in your pre-trip inspection is to verify that your emergency kit is stocked with proper equipment and first aid items. You should have the following:
- Fire extinguisher(s) are charged and secured
- One spare fuse for each type of fuse needed for your equipment
- Early Warning devices (3) for stopped vehicles
- Flashlights
- Blankets
- Nonperishable food and water
- First aid items, like band aids, gauze pads, pain relievers, etc.
Stay Safe & Avoid Roadside Inspection Failure
A thorough pre-trip inspection is a non-negotiable aspect of safe and responsible trucking. By dedicating time to these routine checks, you not only enhance your safety on the road but also significantly reduce the risk of failing a roadside inspection due to unsafe and noncompliant driving.